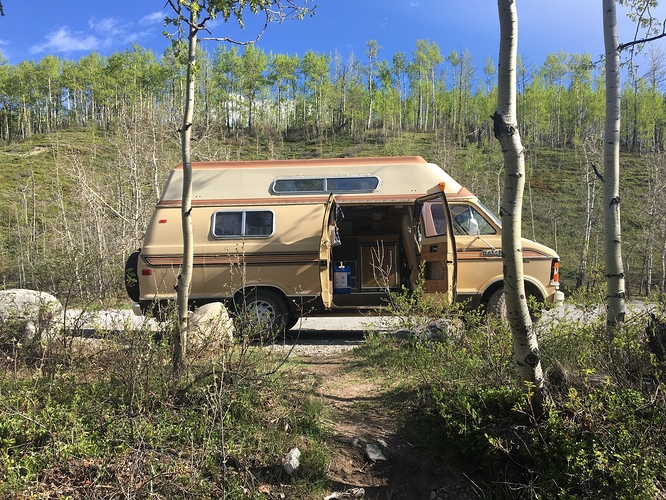
I’m starting this thread to share my planned upgrades to my camper van. It’s a 1982 Dodge ram van with a fibre glass topper.
I’m not doing a total gutting or “build” of the van, which seems to be what most of the builds are on here. So I wanted to share my planned upgrades so that people know they don’t have to do everything from scratch - or all at once!
My to-do list:
Buy and install new coach battery (old one was toast due to a short that I found and fixed)
Rip out old-old carpet (the original shag carpet is still evident inside the bottoms of some storage areas and is gross and dusty)
Rip out slightly newer carpet (main flooring area has a low pile carpet which looks to have replaced the old shag carpet) and small section of linoleum and lay down new flooring
Scrape off all old sealant around windows, clean and re-seal
Build compartment for the small toilet (needs to be secured or it slides around)
Build storage in the back/trunk area
Paint some of the surfaces to lighten up the interior (feels dark to me so some lighter paint should help with that)
Make window coverings with reflectix to help with keeping the van cooler on hot days
Replace the bed cushions with new foam and fabric
So that’s what I need to work on! Or at least what I HOPE to achieve this summer… Winters in Canada will see this baby in storage - so I have to both use it for fun short trips this summer and also find time to do these upgrades.
Will try to post how I do things and photos of the process on here.
Wish me luck!
Edited: to add in the new bed/seat cushions I forgot to include!
For now - no. I have a 3-way fridge so it will likely run mostly off the propane, the lights run off the single battery just fine, and I don’t have a fan (just a roof vent). So for now it’s probably good for the power I need, but in time (and depending on whether the fridge lasts haha) I could maybe add a second battery. The control panel for it is also super old. If I decide to upgrade more electrical it will likely require quite a few more upgrades!
Hopefully around $700, I’ve already picked up some supplies, and some I still have to figure out (storage and toilet solutions) so hard to say - but I’ll try and keep track to see if my estimates are close!
$60 for a roll of reflectix
$150 for new battery
$25 for new sealant
$10 for a plastic scraper and some paint thinner (to help remove the adhesive on the window caulking)
$5 for a utility knife to cut carpet out and scrape off window sealant
$100 for new flooring (tbd - need to measure actual square footage)
$100 for painting supplies (primer, roller, paint etc.)
$50 estimate for lumber/supplies for the toilet and some storage (hopefully less though!)
$200 fabric, foam and a bottle of wine to my friend who is going to make some new seat cushions for me
There’s other stuff I will use but most tools or other random items I might need (like a caulking gun) I already have!
Edited: to add in the new bed/seat cushions I forgot to include!
Thanks! Not nearly as exhaustive as some people builds - but I’m trying to itbwithout breaking the bank or getting too deep into something I can’t finish haha.
Started on stripping old sealant today. Some tutorials I found on resealing window leaks involved taking the whole window out. I didn’t think I had the current skill set for that yet so I decided to follow this process:
So I’ll be using a combination of metal putty scraper, plastic scraper and a utility knife to remove all the old sealant from all the windows and a few spots where there are little openings on the outside (like where my shore power cable comes out).
From what I can tell, previous owners added both some old sealant (crumbly and white) as well as silicone sealant (SO difficult to remove!!!). And there’s also a lot of old butyl tape that’s kind of gunked out that I’m cutting or scraping away. And a lot of it was put on very poorly and smeared all over the van.
Next steps will be to clean it super well (once all the old sealant is gone) and then recaulking it all! I saw a blog somewhere that suggested using some painters tape to help the sealant apply more cleanly so may try that.
After hours of scraping and rubbing off the old sealant which also took a bit of paint off here and there as well (oops!), I used mineral spirits to do a final clean of all the areas around the windows. Lots of dirt and gunk game off so I’m glad I did!
I loaded up my caulking gun with ProFlex RV sealant. Everything I read recommended using it for RV/Van sealing. I bought two tubes at an RV repair place close by (most RV places have it, did not find it at any Home Depot or other home hardware type stores).
I caulked on smaller sections at a time then dipped my fingers in soapy water to help smooth it out (prevents it from sticking to my fingers). Worked like a charm and got it all done with only one tube!
The work continues! I have sealed a few more places where the fibreglass topper connects to the van body where I think there was moisture coming in. I’ve also ripped out all the old shag carpet from inside the storage areas and under the cabinets (that might have been the grossest thing - glad I wore a respirator is all I have to say about that!).
I also bought the new battery and connected it, which wasn’t as scary as I thought (electricity kind of scares me).
Next steps are going to be to get some new cushions made, and build the toilet compartment and the storage in the back!
There is a “trunk” sort of space in the back of the van that I am hoping to build something to house the toilet, so it’s not just sitting out in the open. I’ve seen a few different ways of doing it and one of them is like the one you describe. But since it will be in the trunk area, I don’t need it for seating -but I want to find a way to use the space above the toilet for storage or something. Will keep you posted on what I end up doing!